Showing posts with label WIP. Show all posts

Sunday, 4 December 2011

Codename: Babushka

The London Graphic Centre does three sizes of Russian dolls in plain wood. I'd spotted these on a previous visit and planned to create some for my daughter. After seeing the previews for the Codename: Babushka show mentioned previously, I purchased the mid-size set.

Here, then, are WIP shots of my 5 dolls...

Sunday, 27 November 2011

Rictus - further WIP

Rictus is coming along nicely. Here you see further work on his hair, flower, shoes and further coats evening out his flesh and face paint.

Saturday, 26 November 2011

Rictus WIP

Here's some early work in progress for Rictus. I used a pink Munny, all colours by POSCA. The hat is from a Cornetto!

Wednesday, 16 November 2011

Magma - Some WIP

Here are a few work in progress shots for Magma. You can see how the lava pattern was built up, and I've included a shot of the markers I used.
POSCAs and other markers used on this project

Monday, 14 November 2011

Capes!

As mentioned before, many of the Cape Eebil characters will wear capes. The Vinyl/plasticard I bought is quite flexible, so I made a cape for Debbil.

I started by making test capes out of paper. For the first attempts, I kept the collar and cloak as separate pieces, but I made them one piece for the final cut.

The cape is anchored to the Munny by the neck ring. Thus my template was essentially two triangles with a ring between them. Once I had cut the cape out, I folded it across the ring - this left a half-circle that I could then slide into the neck gap from the back. The cape and the hood needed bending up and down to make them sit properly.

Finally, I added some creases to the cloak so that it sits over his trident.

The last thing was to colour one side of the red vinyl black. I decided on red outer, black inner - opposite to Vampy. Pictures below.

Debbil WIP

Work continues apace on Debbil. The White POSCA covered red vinyl in two coats, which I found impressive. Here are some more WIP shots

Sunday, 13 November 2011

Work begins on Debbil

Using my newly discovered Pilot marker, I started on Debbil.

The pilot worked really well, creating this with none of the smudge of sharpies. As mentioned before, the Extra-fine is not great for covering large areas, such as his head.

Friday, 11 November 2011

More Vampy WIP

Here's Vampy after a little more work. Black acrylic on his hair, jacket and trousers. White acrylic on his shirt and as undercoat for the cummerbund. The cummerbund itself was done with Faber-Castell 'Pitt' markers, which sort of work, but again, don't dry properly. Gold/brown acrylics on the chain/clasp.

New project - Vampy WIP

So, Cape Eebil is my new project for creating a series of custom Munnys (see links).

first marks

Vampy was the first Cape Eebil Munny that I began - my second Munny. He's a Green vinyl original, and at first I worked on him with sharpie markers. Bad Idea. They mark just fine, but the ink doesn't dry properly and handling it leads to smudges. I later covered the black areas of sharpie with black acrylic paint.

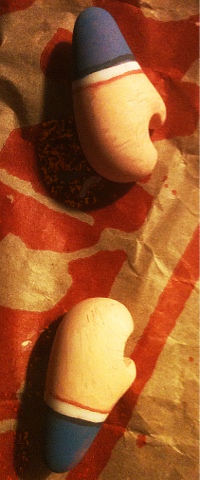
On this work in progress shot, I've just marked in his main features.
He's wearing a tux, cape, dress shirt and cummerbund. Smart gold buckles on his shoes too...
Around his neck is a golden clasp and chain to hold on his cape - hold on, where's that? Well, I haven't made it as yet, but it will be made from vinyl/plasticard.